Track Plan

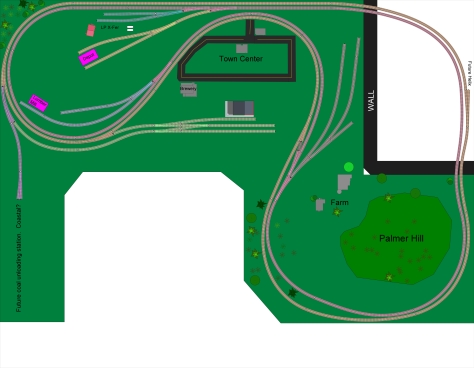
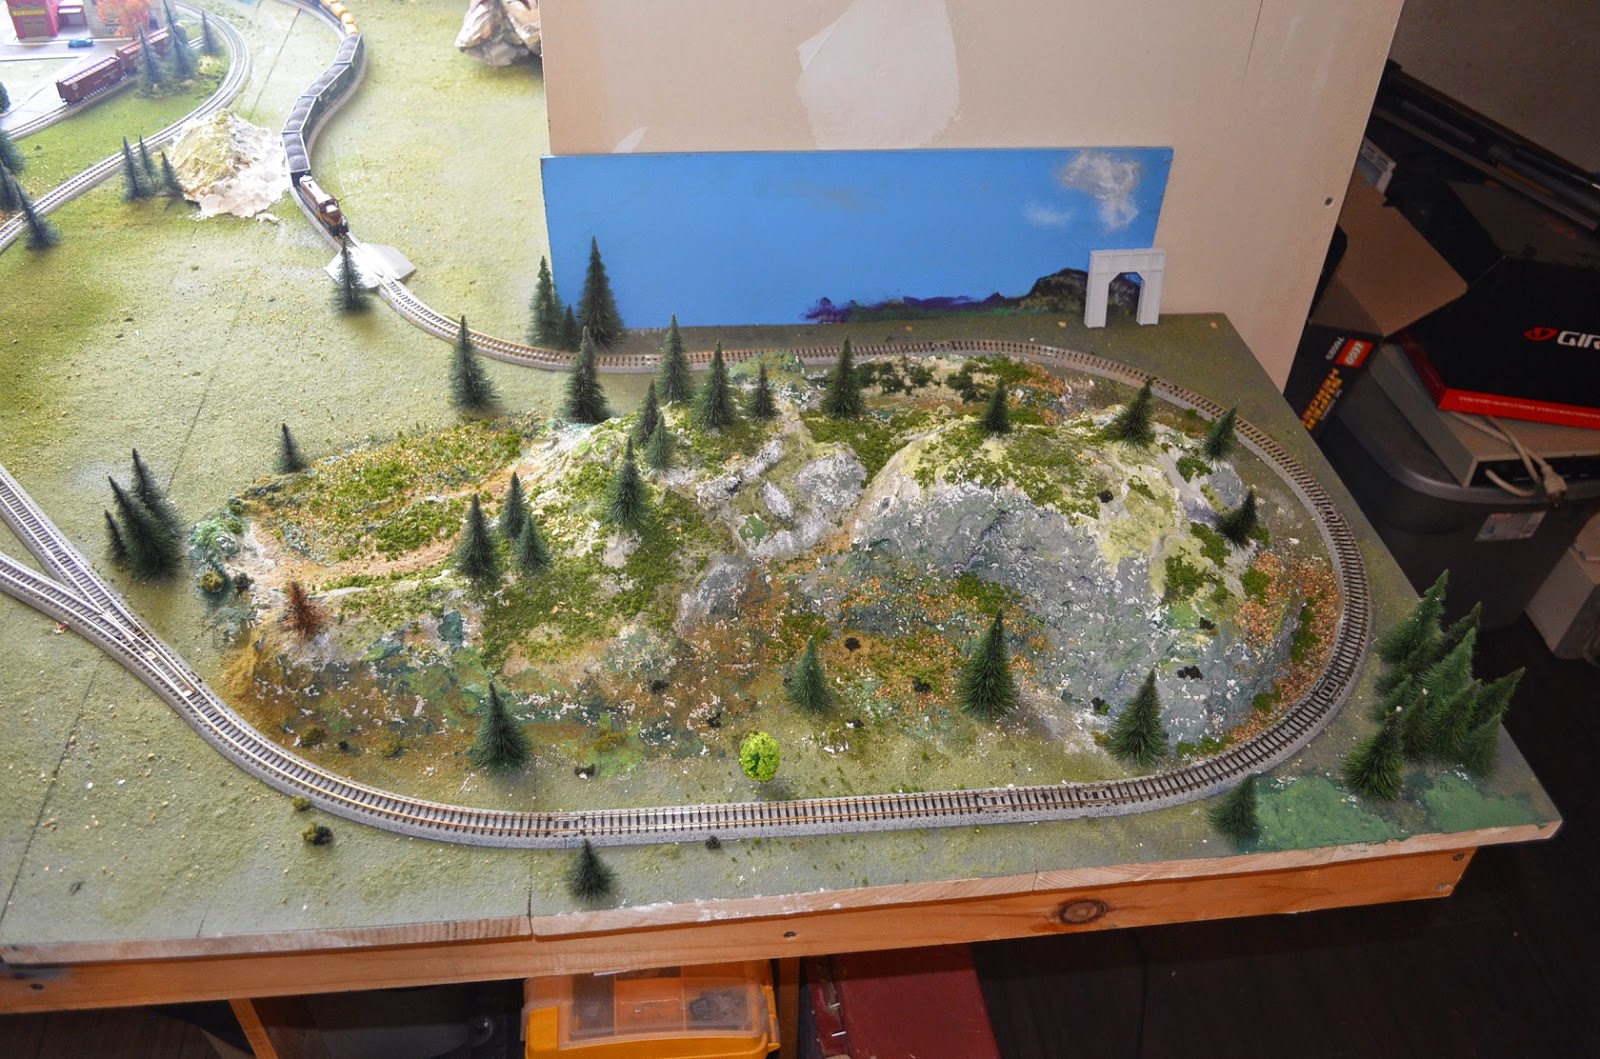
Here is a look at my track plan.  It consists of two outer loops and various sidings for industries.  The spur on the left will be expanded down to a coal unloading dock on the coast.  Industries in the center will include a sawmill where logs will be dropped off and lumber will be picked up, a liquefied propane unloading station and various shipping depots.  In the upper right corner, the cut out shows the two loops traversing a mountain via a tunnel.  There is a spare switch in the mountain for a potential helix.  This helix may eventually lead to a future upper deck where passenger service will be managed.  The layout is currently in one corner of my home office, there is a lot of potential for expansion.

NScaleLayout Grampy

Box Car

Picked up box car # 8019.  Like with the refer, it got new wheels.  Almost every car I buy needs a wheel upgrade.  The factory flanges are tall and ride on the railroad ties.  Such was the case with this car. #code55problems

2016-01-07 21.01.30

Track Tip: Stagger your rail joints.

While laying flex track years ago I discovered a method for keeping the rails parallel at a joint.  If not carefully laid, flex track will “kink” at a joint in a curve.  To combat this, typically you hear of people soldering the joints before bending the track.  I typically don’t like to solder my joints, as I often change the track around and soldered joints would make this very difficult.

I discovered the rails will stay parallel if the joints are offset or staggered.  By carefully removing a few spikes, rail joiners can be offset.  Here is an example of such a joint.  The joints are separated by about an inch or more.  If very careful, you can accomplish such a joint without removing any ties.  This prevents you from having to glue them back in later.

Staggered Joints

Loop Expansion

With the transition from Kato Unitrack to Atlas Code-55 track, I decided to extend the table by a few inches.  This would allow for broader curves, and a more natural look to my new passenger cars.

Before Expansion and Conversion

After Expansion and Conversion

Tunneling

Every layout needs a tunnel!  I built a table in the closet to support the track as it ran through the “tunnel”.  The track is positioned such that a second line could be run to the inside of the curve.  There is the possibility of adding a helix here as well.

Table built.

Detail of ramp: 3/4″ rise.

Track Conversion

The layout I inherited from my grandfather was done with Kato Unitrack.  I knew I would eventually convert it to something more realistic.  I’ve liked working with Atlas brand track, and its easy to get a hold of, so it was my natural first choice.  That and I had a box of Atlas flex-track and cord roadbed in storage.

I could not convert the entire layout in one fell swoop, buying all the switches would exceed by budget.  I would need to do it in sections.  I planned on converting the loop first, followed by the various sidings.  In order to accomplish this, I created two sections of conversion track.  They would be placed at the beginning of the conversion and one would “move” with the end of the converted track as I converted different sections.

Custom built transition track

I built two pieces, each a different length.  I have one that is a combined 3″ long and a second one that is a combined 9″ long.

I’ll upload another picture in the future, when the pieces are not in use. =p